How to log in to Pelican
Pelican works only on an Android device, so make sure to have one or contact our support team to receive Glovo’s Sunmi device as soon as possible.
Here is how you can log in to Pelican on the Android device:
Enter your login address and a temporary password you received via email on the day of your transition to the tool.
Allow the Pelican app to run in the background to allow notifications of orders.
Repeat the process for every Store Address ID separately.
📝 Note: Make sure to have at least 500 MB of memory on your device to use the Pelican app. For example, you can delete a Google Chrome application, by selecting “Settings → App→ Google Chrome → Uninstall”.
If you encounter any issues with the device or the application, here is what you can try:
Make sure your device with the app is connected to WiFi.
Restart the device by simultaneously pressing and holding down the power and volume-up buttons until the device turns off. Then press the power button once more to turn the device on.
Make sure that you have the latest version of the app.
If you are having issues logging in, check the FAQs here. And if you still haven’t found the answer, contact our support team.
How to contact our support team if the issues are not resolved
If you need help, our support team will be ready to assist you. Choose the option that fits your issue:
For live orders or app/device issues:
- Open the Pelican Help Center and start a live chat
- Call our support team.
To start a chat in GoDroid:
- 1
Tap the headset button at the top of the screen.
- 2
Select “Help with ongoing order”.
- 3
💡 If you choose a past order, you will be guided to send a message through the Manager Portal.
How to manage the store’s availability status
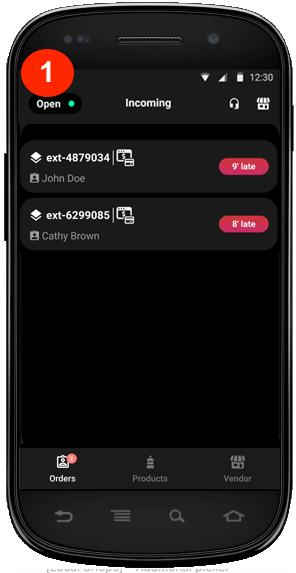
If your store has high-demand hours, you can set a different availability status so your customers can’t order from your store until you are ready to receive orders again.
- 1
At the top of the Pelican app, click on the “Open” icon (1).
- 2
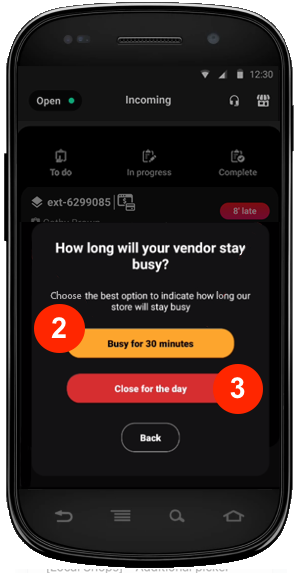
Select “Busy for 30 minutes” (2) or “Close for the day” (3).
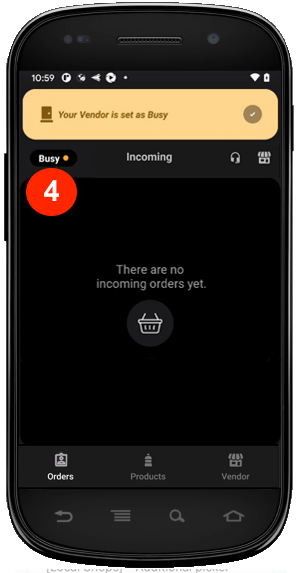
If you select “Busy for 30 minutes”, it will close your store for 30 minutes and automatically reopen after 30 minutes. If you don’t need the full 30 minutes, follow these steps:
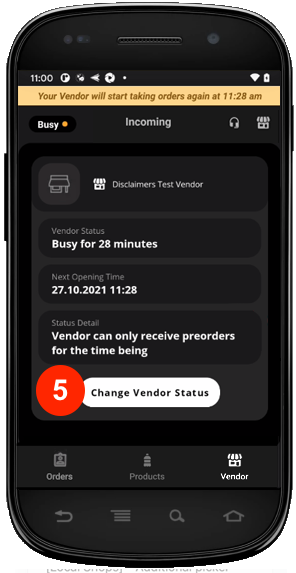
Click the “Busy” icon (4).
“Change Vendor Status” (5).
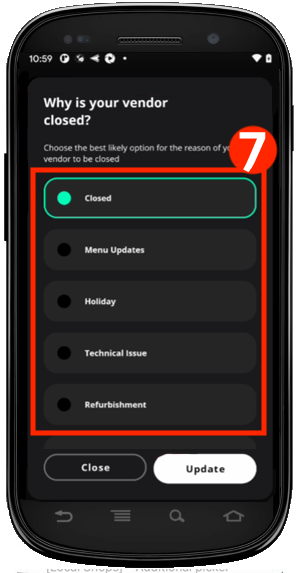
When you choose “Close for the day”, choose an accurate reason (7). Pick the accurate reason, and then click “Update”. Your store will remain closed until your next opening time is set.
📝 Note: When choosing any of these options, your already assigned orders won’t be cancelled to ensure the best customer experience. Make sure to collect the orders and hand them to couriers.
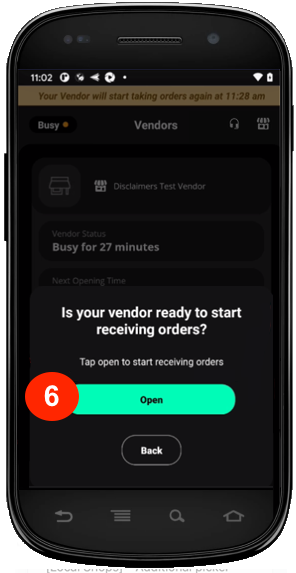
If you decide to reopen your store earlier, you can click the store status icon again and then click “Open”.
Finally, if you want to change the store schedule, you can do so in the ”Opening Times” section of your Manager Portal.
How to manage ongoing orders
Step 1: Assign the order
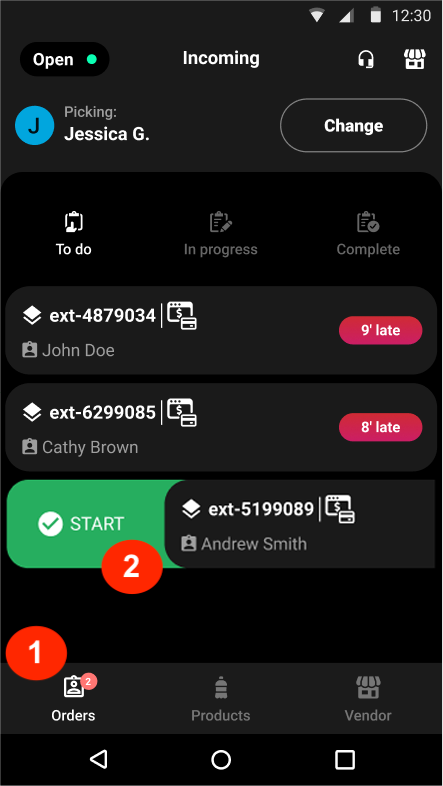
When you receive a new order, you will hear a sound notification and see it in the “Incoming” orders screen (1). To start working on the order, you need to assign it by swiping to the right using a sliding motion (2).
Step 2: Start the order
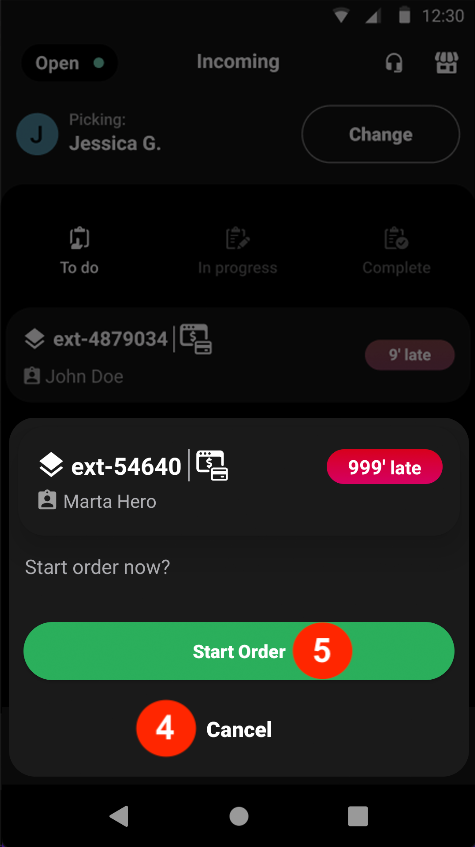
Tap on the order, and you then have the option to cancel picking the order (4) if you accidentally picked it up and can’t complete it now. The order will move back to the “Incoming” orders screen. This allows someone else in your store, who has access to Pelican on a different device, to pick up the products and complete the order.
If you wish to start the order, click “Start” (5).
Step 3: Check the order details
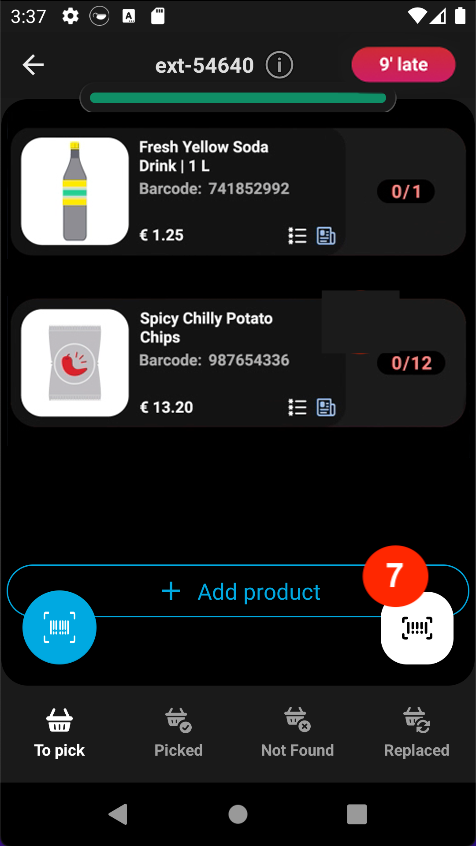
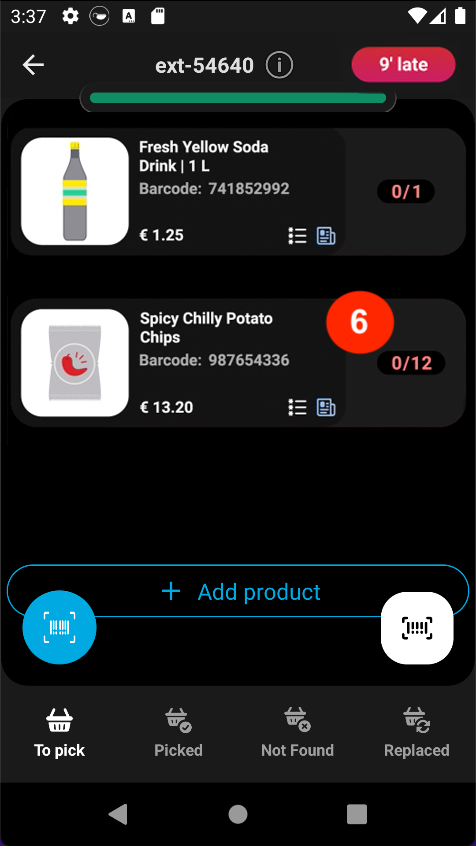
When you click on the order, you will see a list of all ordered products, how many you have picked, and how many were ordered (6). For example, 0/12 means 0 of that order has been picked, and the customer ordered 12. Once you checked the order details, start picking up the products.
Step 4: Collect the ordered products
You can pick the items in two different ways.
- 1
The first way is by scanning the products. To do this:
Click on the scanner button (7).
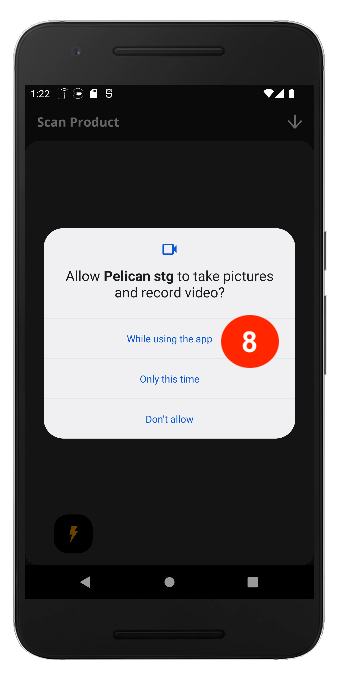
The first time you do this, you may need to allow Pelican access to the camera by choosing the “While using the app” option (8).
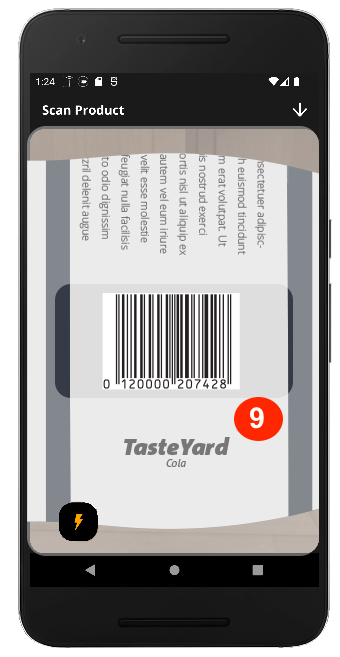
Next, scan the barcode on the first product’s package (9). If, for example, the customer ordered 3 of the same product, you’ll need to scan the barcode 3 times.
📝 Note: when a product is ordered with quantity 1, it is marked as picked immediately.
How to edit products in the order
Since Pelican has been designed specifically for groceries and retail partners, it has multiple functionalities to cover any possible need of such partners. Depending on an issue your store experiences, we will guide you through the solutions.
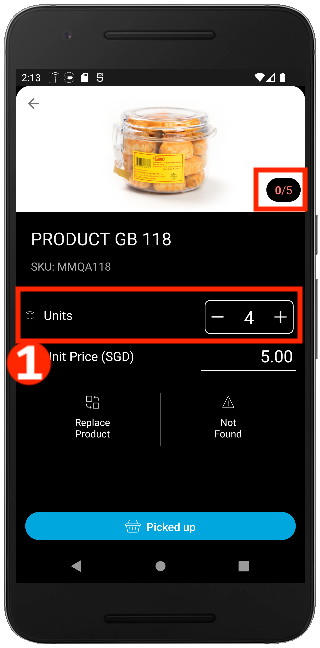
Case 1. You don’t have all the items your customer ordered
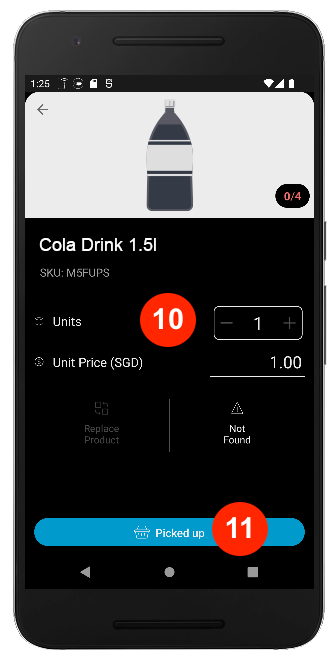
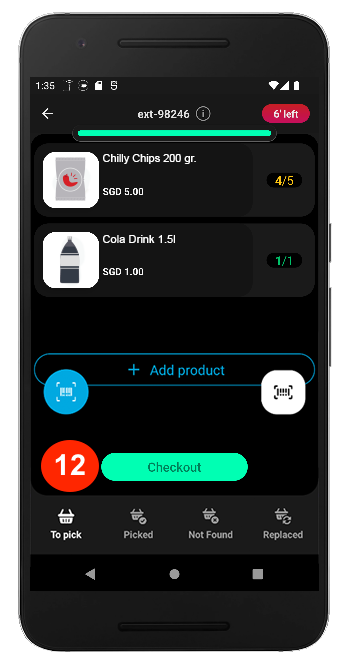
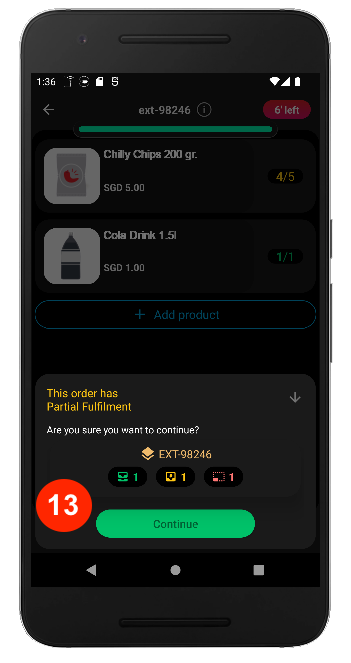
If you don’t have all the items as the customer ordered (for example they ordered 5 and you only have 4), put in just the amount you picked (1). In the app, this is called “Partial Fulfilment”.
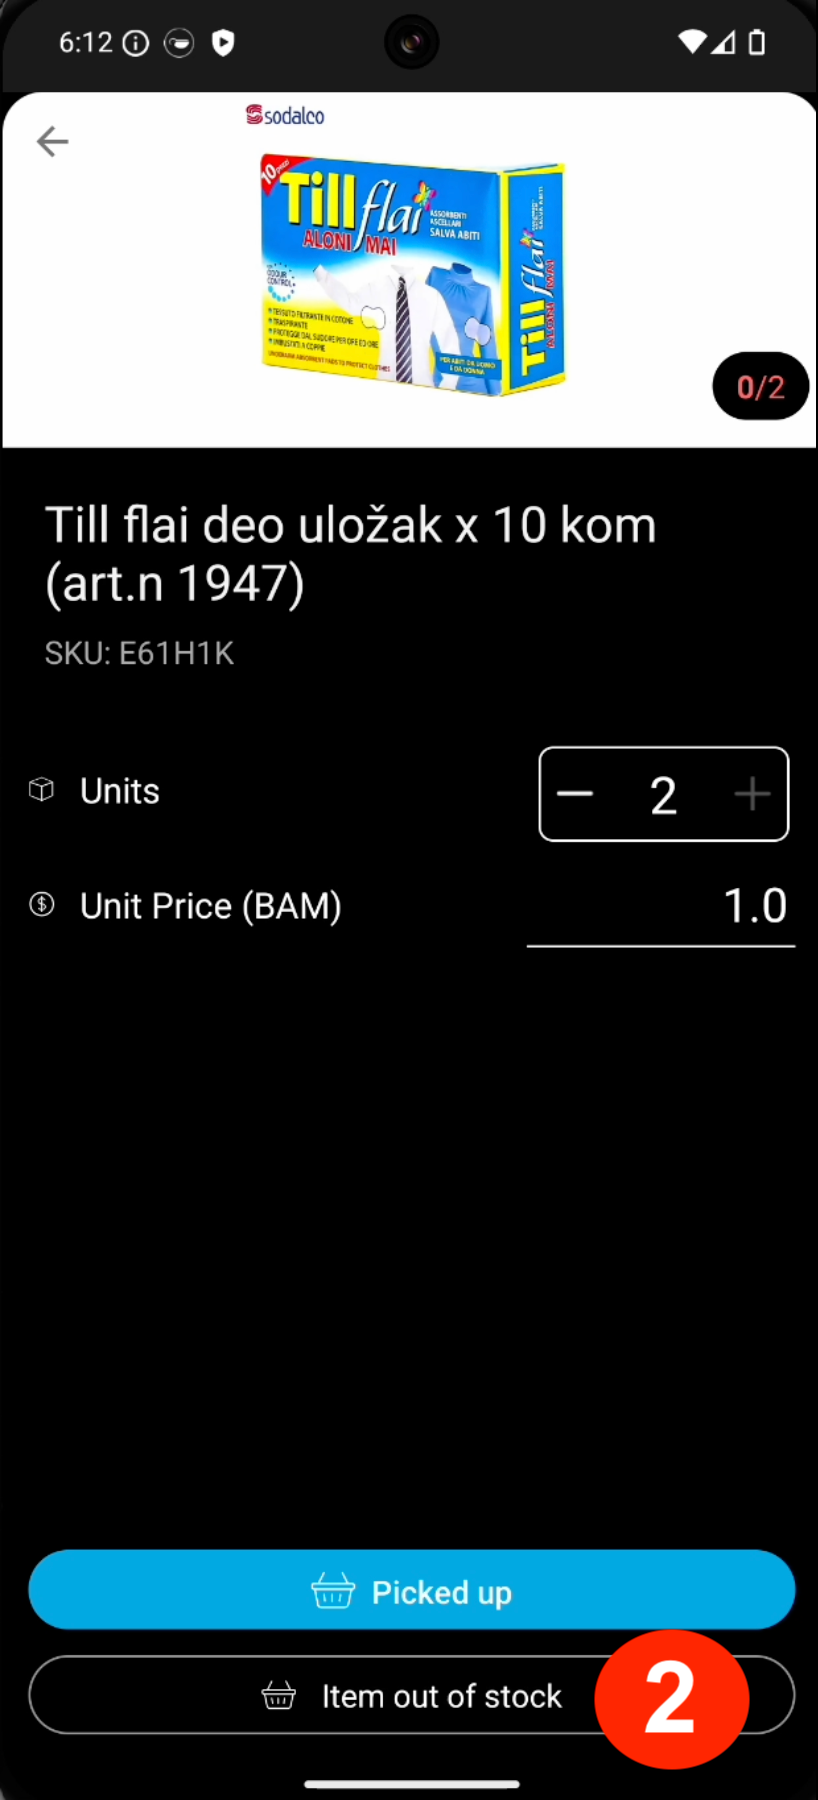
Case 2. The product is not available anymore
If the product is out of stock, click the “Item out of stock” button (2).
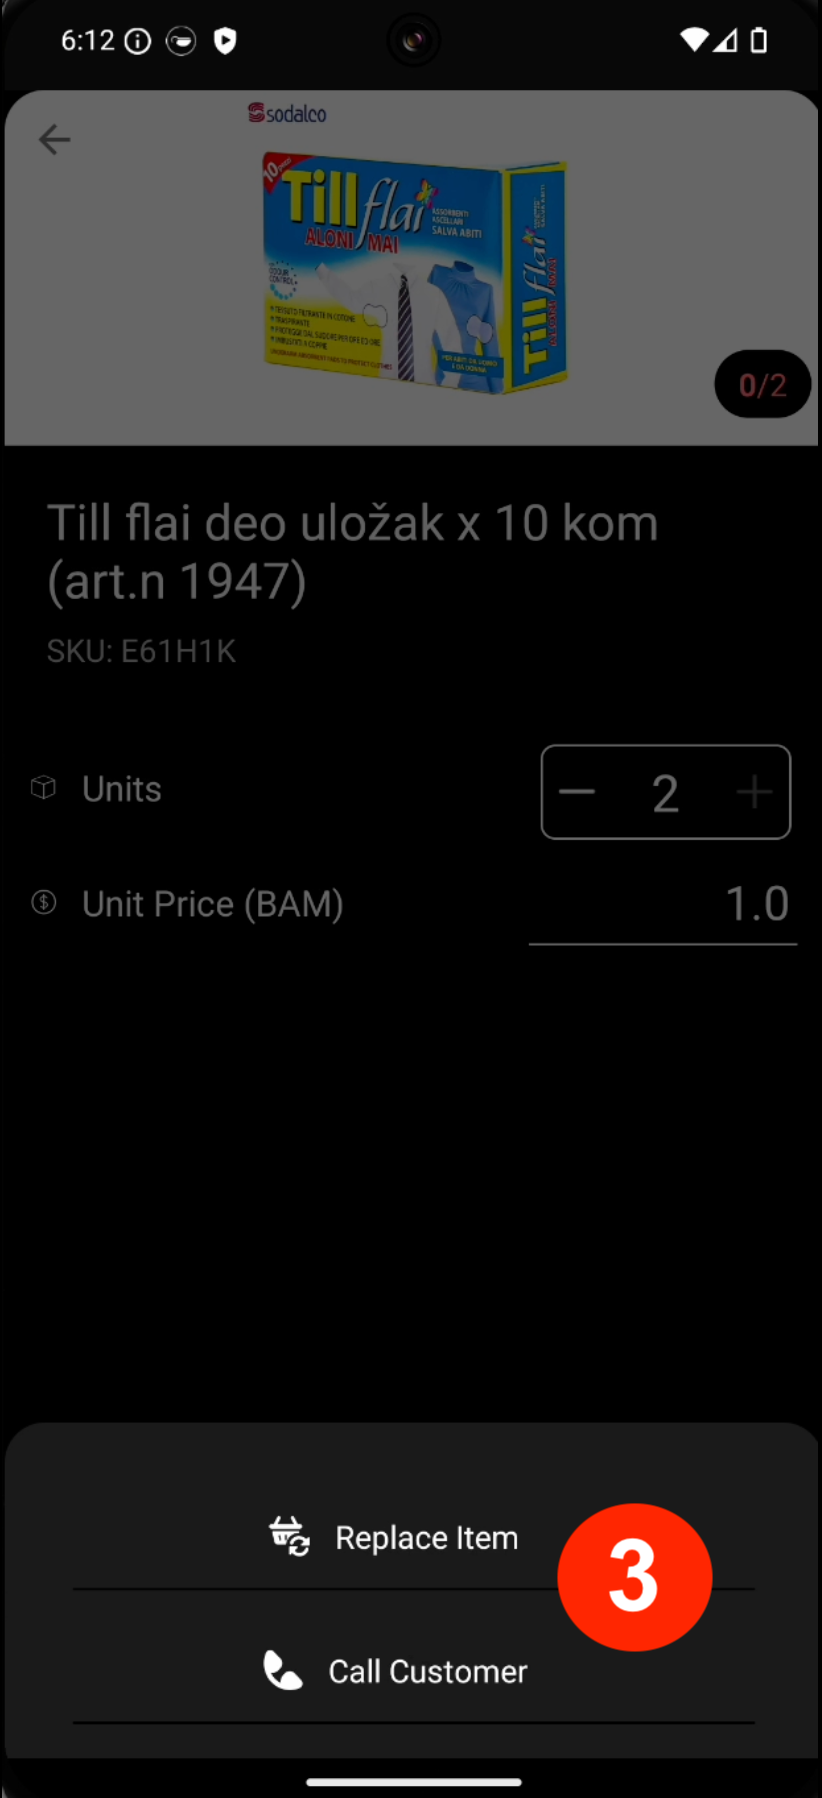
Next, call the customer by clicking the “Call Customer” button (3) to discuss and confirm a replacement for the out-of-stock product.
After confirming with the customer, click the “Replace Item” (3) button to select an appropriate replacement.
If the customer does not agree with the replacement, you can remove the item from the order. Click the vertical ellipsis and then the “Remove Item” button (4). Confirm the removal by clicking the “Yes, remove item” button (5).
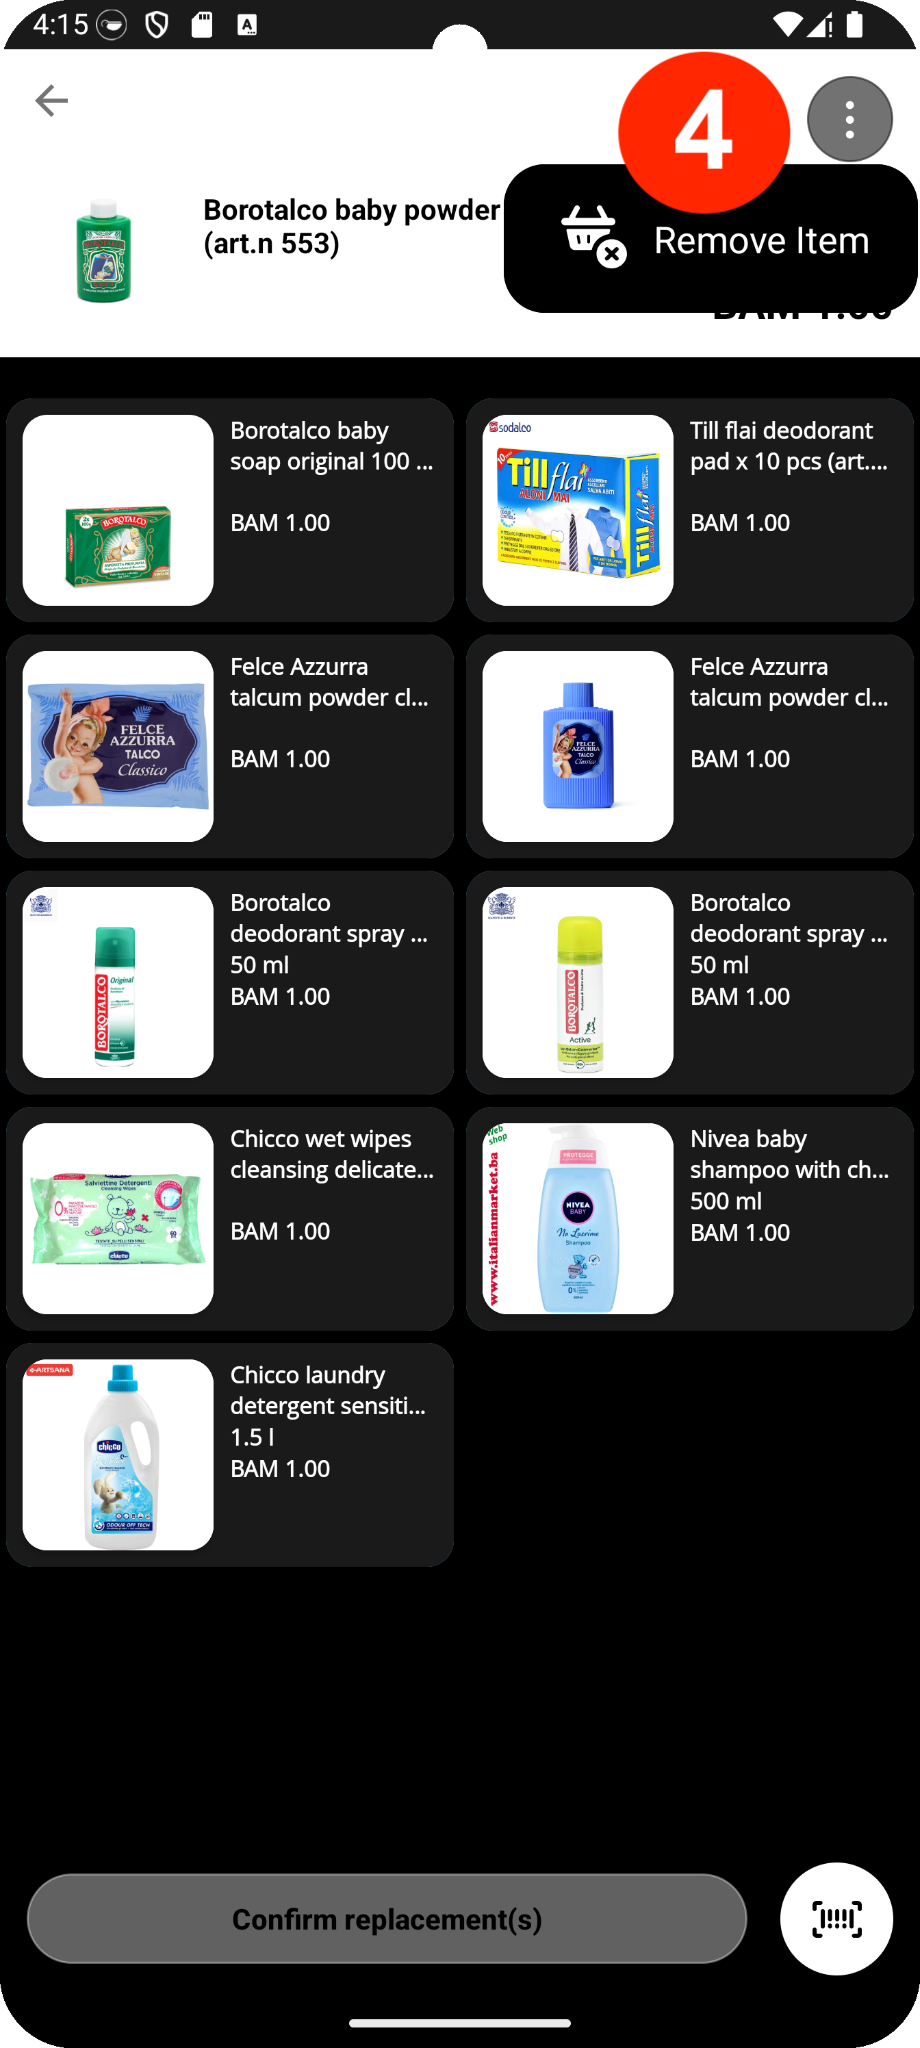
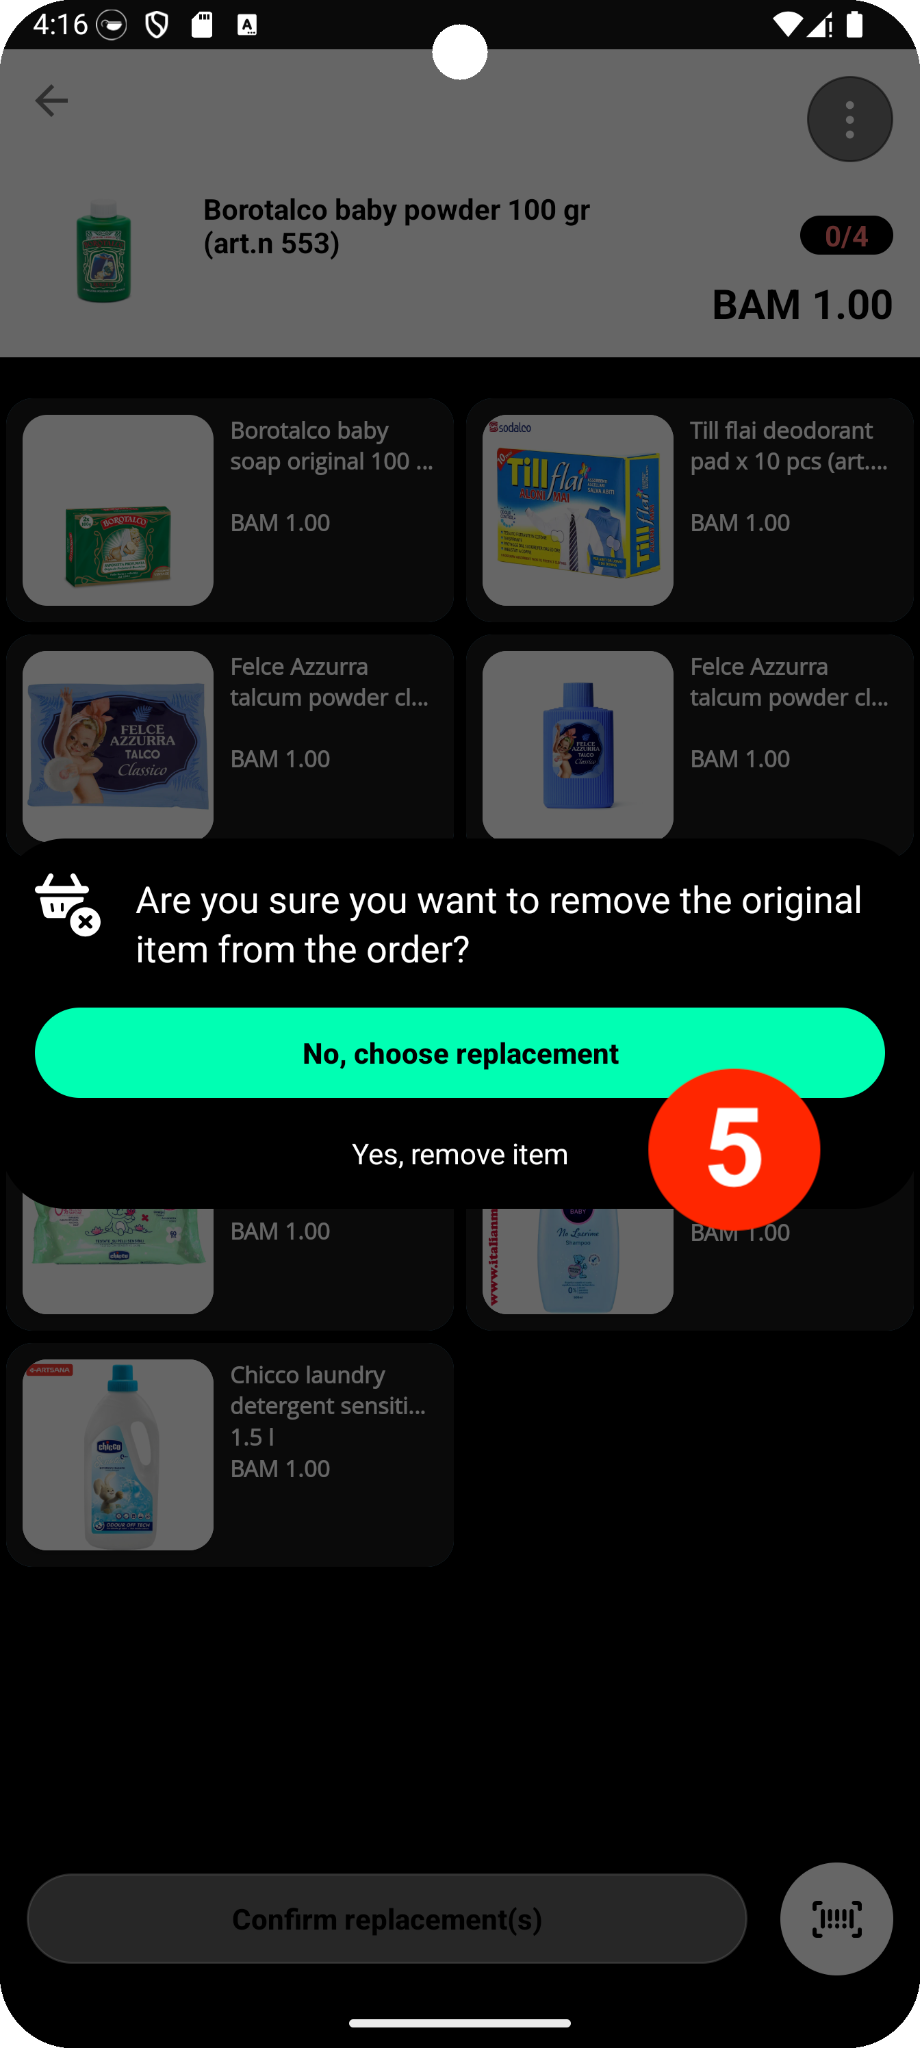
We highly encourage replacing the items instead of removing them to provide a better customer experience.
Case 4. Change the price of the product
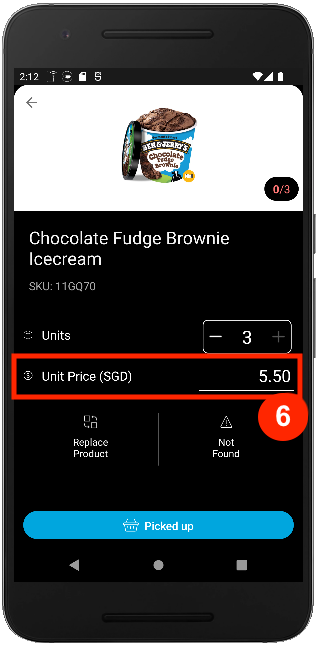
Sometimes the price of one of your products may have changed or it was different on the app when the customer ordered it. You can change the price of a product when you are picking it. To change it, simply enter the new price (6) in the app.
How to deactivate unavailable products
In the Pelican app, you can also disable products and they won’t be shown to your customers in their Glovo app.
- 1
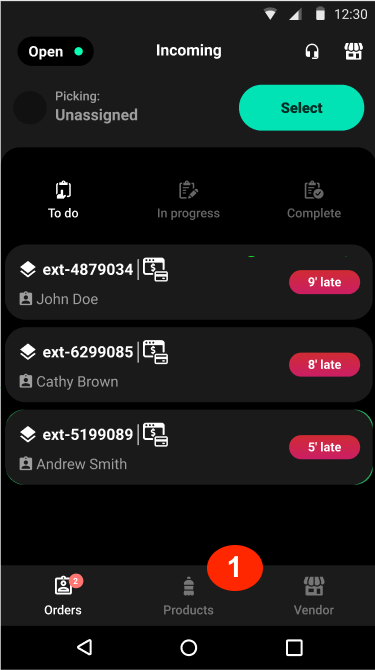
Go to the “Products” tab (1).
- 2
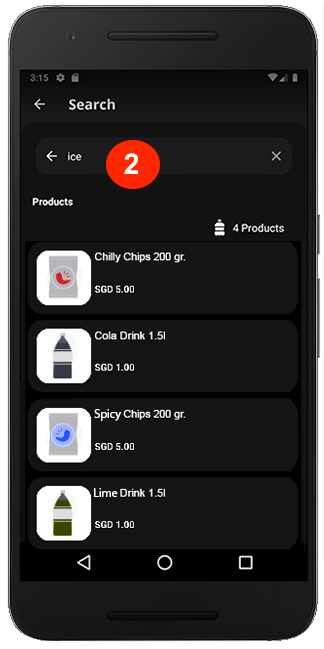
Find the product in the search bar (2) by product name or SKU.
- 3
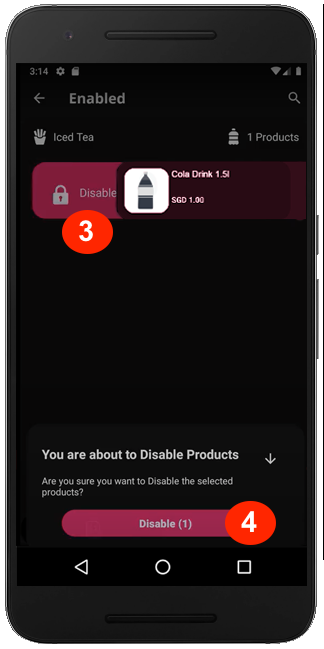
Swipe to the right (3), and click “Disable” (4).
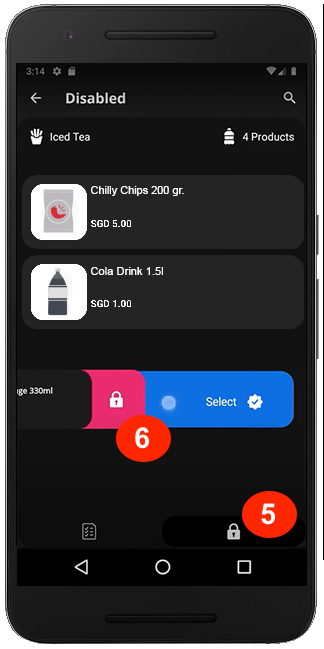
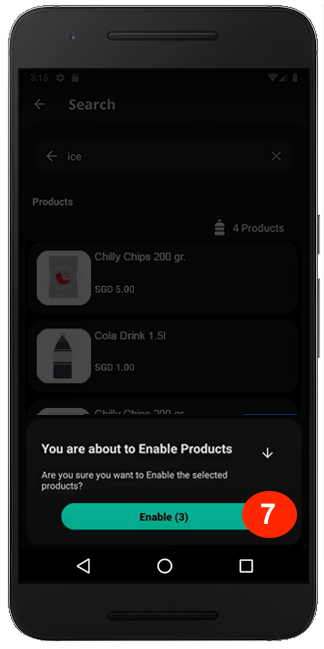
If you want to enable the product back, click on the lock icon (5), then swipe to the left to select a product (6), and click “Enable” (7).
 NG
NG
 How to use Pelican